Difficulty
Easy
How to find the perfect bike fit
Numb hands, a sore back, or a stiff neck can ruin your ride and cause long lasting injuries. Follow these steps so you can ride efficiently and comfortably
James Howell-Jones
Junior Writer

Finding the right bike fit can prevent sore knees, backs, bums and hands. You can get a professional bike fit, but you can do a pretty good job at home too. Our steps take you through the bike fitting process. Follow along carefully, and you should be able to get comfortable on your bike.
If, after following our steps, you're still not comfortable, you might benefit from a professional bike fit.
Read more: Should we all get a professional bike fit?
Remember, whenever you’re tightening bolts on your bike, make sure you adhere to the suggested torque ratings printed on the bike!
Tools Needed

Step 1
Set the saddle position
The first step when setting up your bike is to get your saddle positioned correctly. We’ve got an in-depth guide for setting your saddle height and position that’ll tell you everything you need to know.
Once you’ve set your saddle position, leave it where it is. Don’t be tempted to adjust it forwards or backwards later in the bike fitting process to affect your reach.

Step 2A
Set the stem position
Adjusting your stem affects how stretched out you are on the bike. If your stem is in the correct position, your body and arms should both be at a 45-degree angle to the ground when you sit on the bike, leaving a 90-degree angle between your arms and your body.
If that’s not the case on your bike, you need to change your stem position, and you might even need to swap it for a different one.
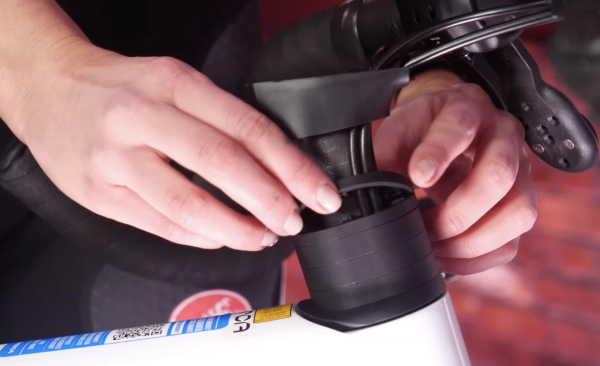
Step 2B
Adjust the height of your stem
If that’s not the case on your bike, you need to change your stem position, and you might even need to swap it for a different one.
Before you go buying a new stem, adjust your position by changing the amount of spacers above and below your current stem. Raising the stem will make you more upright, and lowering it will make you more stretched out.
On traditional stems, you can flip them to change the angle further still.
But if adjusting the stem’s height or orientation isn’t giving you enough movement, you might need to exchange your stem for one with a different length to get the right position.
Top Tip
Over time, you might want to consider whether you want to adjust your position to suit your style of riding.
If you want a faster, more aerodynamic position – and if you’re flexible enough – you can drop your handlebars or extend your reach. This will make your back flatter and your frontal area smaller. You can do this either by putting less spacers under your stem or getting a longer stem.
If you want something more relaxed and comfortable, you can try moving the handlebars higher up or closer to you. You can do this by putting more spacers under your stem, or getting a shorter stem.
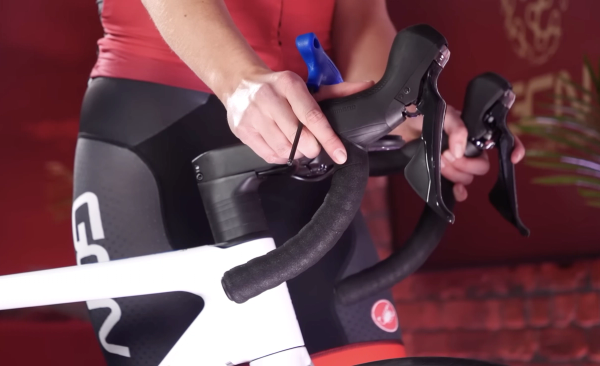
Step 3A
Adjust the handlebars
Another way of adjusting your reach is by changing the position of your handlebars and brake levers. Twisting the bars up or down slightly can have a big impact on your position, as can moving the brake levers up and down the bars.
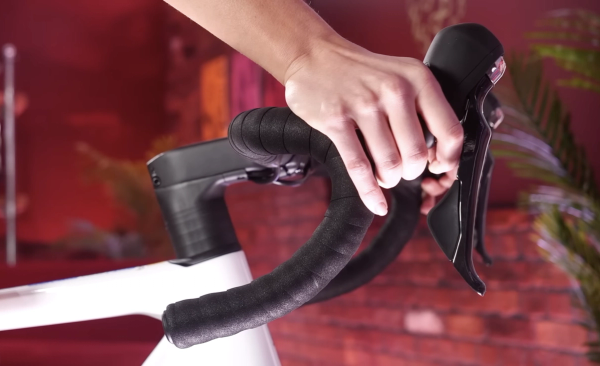
Step 3B
Consider swapping the handlebars
Consider what shape of handlebar is right for you. When deciding, there’s three measurements to consider: the width, the drop, and the reach.
The drop is the distance between the top of the handlebars and the bottom of the curved section. A shallow drop brings everything closer together meaning your hands don't have far to travel between positions. A big drop will usually suit taller, more flexible riders.
The reach is the distance between the straight part of the bar and the curved section where your hoods are mounted. Bars with a longer reach give riders a bigger variation between riding on the tops of the bars and riding on the hoods. Generally, if your bars have a longer reach, you’ll need a shorter stem than usual.
Finally, there’s the width of the bars. Getting this right depends on your shoulder width, but also on the terrain you ride on. A narrower bar will be better suited for road racing, whereas a wider bar will give you better control over rough terrain and at lower speeds.

Step 4
Consider crank length
The final thing you can change is your crank length. This is a far less important measurement than your saddle height or your reach, but it’s still worth considering. Cranks come in a range of different lengths, and generally speaking, smaller bikes come with shorter cranks and vice versa.
Smaller riders will generally need shorter cranks. This is due to leg length – a long crank could force a smaller rider to over-reach at the bottom of the pedal stroke, or have a very tight hip angle at the top of the stroke.
Generally speaking, larger riders prefer longer cranks, so they can get a fuller leg motion, but increasingly, riders of all heights are choosing shorter cranks.

Related Content

How to wax a bike chain
Waxing a chain is more complicated than applying lube but it's worth the extra effort

Beginner indoor training session: 20-minute sweet spot indoor cycling workout
If you're new to indoor training, this is a good session to start with. No super hard efforts or high cadences, just a good, entry-level session that will burn calories

How to change the stem on a road bike
A new stem can transform the fit and feel of a bike. Here’s how to replace a stem on a road bike

Take it easy! 25-minute aerobic indoor cycling workout
A steadier workout for low-intensity days, or for building into your indoor cycling gradually