Difficulty
Medium
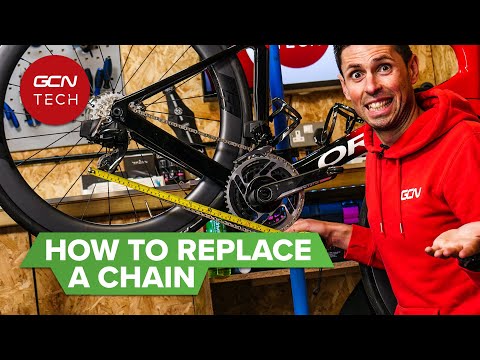
How to replace your rear derailleur
This might seem like an intimidating task, but with the right steps and a few tools, it’s an easy skill to master
James Howell-Jones
Junior Writer


Your rear derailleur manages your chain tension and allows you to change gear on your cassette. They're great, but hanging so close to the ground, it's easy for them to get banged, bent and broken. Thankfully, replacing them is pretty simple. All you need is a few tools (see our tool list on the right) and half an hour or so.
While you're at it, you might as well replace the gear cable too. A new cable will give crisper shifting, and this is a good opportunity to sort two maintenance jobs in one session.
In this guide, we're using a Shimano rear derailleur as an example, but the steps are broadly similar for other brands too.
Have you bent your derailleur, or just the hanger?
If you're switching your derailleur because your derailleur looks like it has bent, consider replacing your derailleur hanger first. These are designed to bend easily on impact, to protect your derailleur and frame. So, if you've had a knock, the chances are it's your hanger that needs replacing, not the derailleur itself.
Read more: Complete guide to road bike groupsets
Tools Needed

Step 1
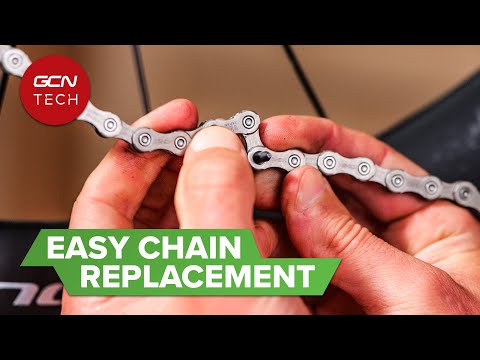
Remove the chain
Begin by removing the chain. If you have a master link, you can use a pair of pliers to remove it. If not, use a chain tool to break the chain.
Read more: How to remove and replace a chain

Step 2
Remove the cable
Remove the cable. Do this by pulling the crimp end off with your pliers, then undo the cable clamp bolt with an Allen key (hex key).

Step 3
Remove the derailleur
Once the cable is out of the way, you can remove the derailleur. Take a 5mm Allen key and undo the main mounting bolt, applying firm but even pressure to remove the derailleur from the hanger.

Step 4
Attach the new derailleur
Add a little grease to the thread of the new derailleur, then mount it with the 5mm Allen bolt. It’s very important to make sure that the angle of the derailleur is right. For shimano derailleurs, the small, swingable piece on top should be horizontal to the ground, with the little nub above the notch on the mech hanger. Unless otherwise stated, torque the bolt to 8-10Nm for SRAM and Shimano, or 15Nm for Campagnolo.

Step 5
Reinstall the chain
Thread the chain back on, making sure to route it correctly through the jockey wheels and the front derailleur, and that the text printed on the links is facing you. Once it’s in, reattach with a master link. Just note that most master links aren’t designed to be reused.

Step 6
Install the gear cable
This is a good opportunity to put in a new gear cable, but if you are using the old one, insert the gear cable back through the micro adjuster and under the cable clamp bolt. Pull the cable tight and tighten down the clamp bolt. Cut it to length, put a cap on the end and crimp it on.

Step 7
Set the H (high) limit screw
All that’s left to do is index the gears, starting by setting the limit screws. These screws determine how far inboard and outboard the derailleur can move and stop the chain going over the largest sprocket into your spokes, or off the smallest sprocket and into your frame. With the chain on the smallest sprocket of the cassette, turn the H screw until the top jockey wheel lines up with the smallest sprocket on the cassette.

Step 8
Set the L (low) limit screw
Now shift the derailleur to the largest sprocket. Adjust the L screw until the top jockey wheel is in line with the largest sprocket on the cassette. You might need to push the derailleur by hand to find where the limit is set.

Step 9
Set the B-tension screw
Staying in the biggest sprocket, adjust the long B-tension screw until the outside edge of the top jockey wheel sits around 5mm below the outside edge of the cassette teeth.

Step 10
Set the cable tension
To set the cable tension, move to the smallest cog then shift one gear up. If the chain chatters but doesn’t move, turn the barrel adjuster counter-clockwise until it does.

Step 11
Check it's all working
Run through all your gears to make sure the rear derailleur is working. If it's struggling to change into the bigger cogs, turn the barrel adjuster anti-clockwise to add cable tension, until the chain moves. If it's struggling to change into the smaller cogs, turn the barrel adjuster clockwise to reduce the cable tension, until the chain changes into the smaller cogs without delay.

GCN's Essential Road Bike Maintenance
For road, gravel, commuter and hybrid bikes, Essential Road Bike Maintenance is intended to be a proper bible to all those essential bike maintenance, repairs, and set-up tasks that we all need to know. Everything from basic bike set-up, how to get your wheels on and off, through setting up gears, bleeding brakes, and beyond to things like installing electronic gears, converting to a 1x transmission and more. In a nutshell, pretty much everything you would want to tackle on your bike (or bikes, plural) yourself. And then some. Like bike set up tips for taller and shorter riders; bottom bracket standards explained; common bike maintenance mistakes and how to avoid them; essential roadside fixes to keep you riding; how to make your bike more comfortable; how to puncture-proof your ride and much, much more. “A huge amount of knowledge, hacks, and know-how to help improve both your workshop skills and your ride” – Ollie Bridgewood, GCN Presenter Each chapter is structured with the tasks you’ll most likely need more of the time at the start (like how to adjust your gears, replacing brake pads, or changing a tyre), before running through to those that you’ll do much more infrequently (such as changing disc brake hoses, servicing a freehub or pedals, and so on). This also means that many of the tasks naturally ratchet up in difficulty as you go through each chapter which should also mirror your natural progression as you become more mechanically capable and confident. In short, 260 pages packed with all the essential knowledge you’ll need to confidently take on and complete pretty much any bike maintenance task. Get Some ‘Show-How’ With Your ‘Know-How’ Each walkthrough is linked to a companion video which you can watch for free from your computer, tablet or smartphone. To watch, either type in the walkthrough’s short-link URL – e.g. https://gcn.eu/GetPerfectShifting – into your browser, or scan the QR code with your smartphone or tablet so you can get the best of both worlds: know-how and show-how. Simple. All you need to know to fix your bike. Product Details: Pages: 260 (120sm) Size: 280mm (h) x 216mm (w) (portrait) Cover: Paperback Cover Finish: 300gsm, silk stock with anti-scuff matte laminate and spot UV gloss finish Please note: There may be some additional shipping charges for orders consisting of 2 or more books. However, our customer service team will contact you after you have placed the order to advise on delivery options. Click here to explore all GCN best selling books

Related Content

How to replace your front derailleur
Our guide to replacing your front mech and getting it shifting smoothly
How to replace a bike chain
If your chain is worn out, here's how to swap it for a new one
How to calculate the correct chain length
A well-fitting chain is essential for proper shifting performance. Here’s how to get it right

How to set up tubeless tyres
Setting up tubeless tyres can be complicated and messy work. Thankfully, it doesn’t need to be